Installing Tension Fabric Structures

Tension fabric structures aren’t erected overnight, but they sure can go up fast. The reason being: tension fabric structures have very few components, so once they’re fabricated and shipped to site, it can take only a matter of weeks to erect one. As a vertically integrated company, we do very little outsourcing and our construction teams have many years of experience in proper foundation and footing construction, steel erection, and fabric installation. After the steel sections and fabric membrane fabrication is complete, a logistics team works on shipping all materials to the site and an installation means and methods is developed to make sure the structure is properly installed with as minimal time on site as possible. Some of the most dramatic images that come from the construction phase are of our expert rope climbers.
In this image, rope access-trained crew members install PTFE cladding on an ocean digester tank in San Francisco, CA.
But there are basically six steps to the installation phase. Barring any hiccups, the operation usually runs smoothly, and without impacting the other trades. Here are those installation steps broken down for you:
1.) Mobilization – This step includes site inductions, safety analysis, trade coordination, receiving equipment, tools, and materials, as well as inventory and QA/QC inspections and inventories of materials.

3.) Confirm Interfaces – In this step, we confirm that all interfaces which our structure connects to are within tolerance and that any mechanical fasteners are set to the proper elevation or dimension. Often a surveyor is used to confirm most of this prior to reaching the site, and our work only requires preparation of the mechanical fasteners.
4.) Steel Erection – most membrane structures require structural steel to support them. Many times there are also wire rope or strand cables integrated into the structure. In this step of the process, crews will erect all steel members and cable supports and ensure they are all set to their design intent.
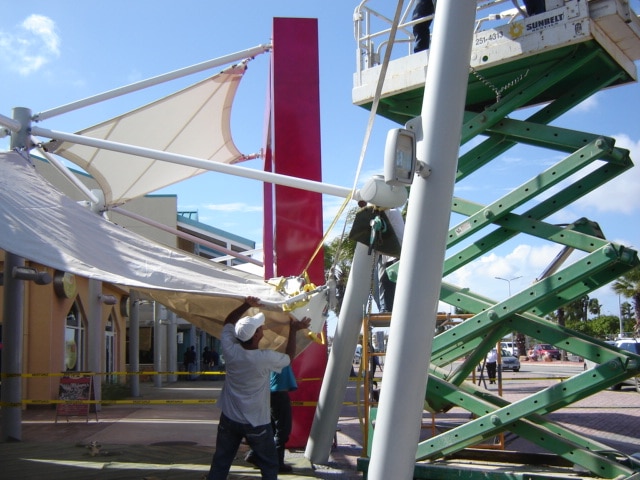
5.) Membrane Installation – there are two basic procedures for deploying tensioned membranes. The first is to open the membrane over protective materials at the ground level and hoist it into position by use of a crane or rigging. The second is to land the folded membrane bundle on temporary ropes or web belts and deploy it in the air. Each job is unique and the method for deployment is always slightly different. Once a membrane has been deployed it will be fastened and tensioned over the previously set structure. There are many different detail and fastening techniques used depending on the application and client preferences, but they generally contain some combination of wire rope cables, aluminum extrusion, and mechanical fasteners.
6.) Detailing – once membranes are tensioned, the structure will be detailed out. In this step, closures will be installed if applicable. All cleaning and touch-ups will be completed and a final QA/QC inspection will be conducted prior to holding a client walk-through.
Other essential components of our Project Managers’ checklists include ensuring that the right equipment and tools arrive on site on time, preparing an adequate shake-out area and protecting the membrane from sharp surfaces, keeping mindful of the weather, completing a thorough inspection of all connections, and finally, closing out and signing off with the General Contractor.
To learn more about the process of designing and installing tensioned fabric structures, register to take our AIA Course entitled “Anatomy of a Tension Structure.”


